• 23Aug

    As sometimes happens, I was unable to stop myself. I didn’t need ground meat of any kind – I’m more of a whole-animal-parts guy – but it was there. Ground venison. I had to. The problem being, of course, that there’s no way I’m wasting that in a burger or ragu or whatever that’s going to totally just treat it like any other unidentifiable ground critter.

    Googling around, I came across this recipe for Korean style ground venison that looked like a nice way to get the needed fat and salt into the meat but also let its essential woodsy-ness come though. Also unable to help myself, I made a few adjustments.

    I used:20150817_193728

    1 pound ground venison
    2″ fresh ginger
    4 cloves garlic
    1″ fresh tumeric root plus an extra couple slices for later
    2 squeezes of raw agave nectar
    1/4 c low-sodium soy sauce mixed in 1/4 c water
    About 6 grams of coconut oil (maybe 1/2 tsp?)

    (Other stuff I’ll explain in a second…)

    1/2 a sweet onion
    1 jalapeno (diced)
    1/2 lb shitakes (clean and slice to taste)
    3-4 scallions (just the greens)

    Slice the onion and start it slowly caramelizing.

    Puree the ginger, garlic, and tumeric in a blender (except the extra slices). Brown the meat, add the spice mix, agave, and soy water. When the meat is almost cooked, add the ‘extra’ tumeric, finely diced. When all done, careful not to overcook, remove it to a bowl with a slotted spoon or mesh strainer.

    Now, your onions should be nice and caramelized. Add them, the mushrooms, and the jalapeno. Sautee that until done (just a few minutes), and remove with your slotted spoon to a serving plate. Plate the meat with the mushrooms (I did side-by-side, as you can see), and then jack up the heat under the remaining juices to create a glaze. Pour the glaze over both sides of the dish, and serve, topped with sliced scallion greens.

    It’s also low-carb and gluten-free and all that if you’re neurotic, but I ate the leftover meat with forbidden rice, and it was awesome too.

    Enjoy!!

    -MAW

  • 27Jun

    Being a junkie for greens runs in my family, and my mother’s new garden plot has been churning out prodigious quantities this year – lacinato kale and rainbow chard, particularly. However, one thing that she does that drives me bonkers is that she trims and only eats the leafy bits – she wastes those lovely crunchy stems (ditto with beets, radishes and carrots – she never uses the greens)!! I’ve taken tons home from family dinners to use myself. I usually crisp-fry them or just add to other greens I’m making, but recently stumbled across this fantastic idea over on the Food52 blog – chard stem hummusHelping my mom cook the other night I couldn’t help but secretly smile as I berated her for again ‘wasting’ the lovely chard stems and beet greens (we made a raw chard salad with fresh lemon and crispy onions, roasted beets, and prosciutto-wrapped halibut). I was taking all those lovelies home, and I had plans for them.

    Being me, of course, I couldn’t possibly follow the recipe exactly. I used:20150627_122124

    • 100 grams chopped chard stems
    • 100 grams chopped beet stems
    • 2oz (1/4 cup) tahini
    • 2oz (1/4 cup) olive oil
    • 2 tbs. fresh lime juice
    • 4 cloves garlic

    First, I washed and chopped the stems, and threw them in a pot of about 4 cups boiling water, to which I also added a tablespoon of salt and half cup vinegar (doing this adds a bit of flavor and improves the texture of the greens for blending). While boiling, I smashed and peeled the garlic, and measured everything else into my blender. After 15 minutes, my stems were soft, and I strained them into the blender, adding about a tablespoon of the liquid to pull in more flavor. I blended it until not-exactly-smooth to yield the comedically pink condiment you see at right.

    How’s it taste, you ask? It’s good. Really good.  Can-I-fit-my-whole-head-in-the-blender-to-lick-it-clean? good. And that’s just the ‘base’ version – I’ve played with is a bit, adding sumac, cayenne, cumin, and in one attempt flax seeds, all of which can dramatically change the flavor to fit whatever dish you’re pairing with the hummus.

    Enjoy!

    – MAW

  • 12Jun

    Please vote for my two recipes in the “V Culinary Challenge.” Mine are the Vidalia Onion Cobbler and Vidalia Onions & Colby Jack Fried Empanadas. Both of these recipes came out delicious, so I entered two dishes. You need to “like” the Vidalia page in order to vote for anything. Then select “Vote Now,” scroll down, and vote for both of them. Thanks!

    The recipes are below: Read the rest of this entry »

  • 15May

    IMG_2701
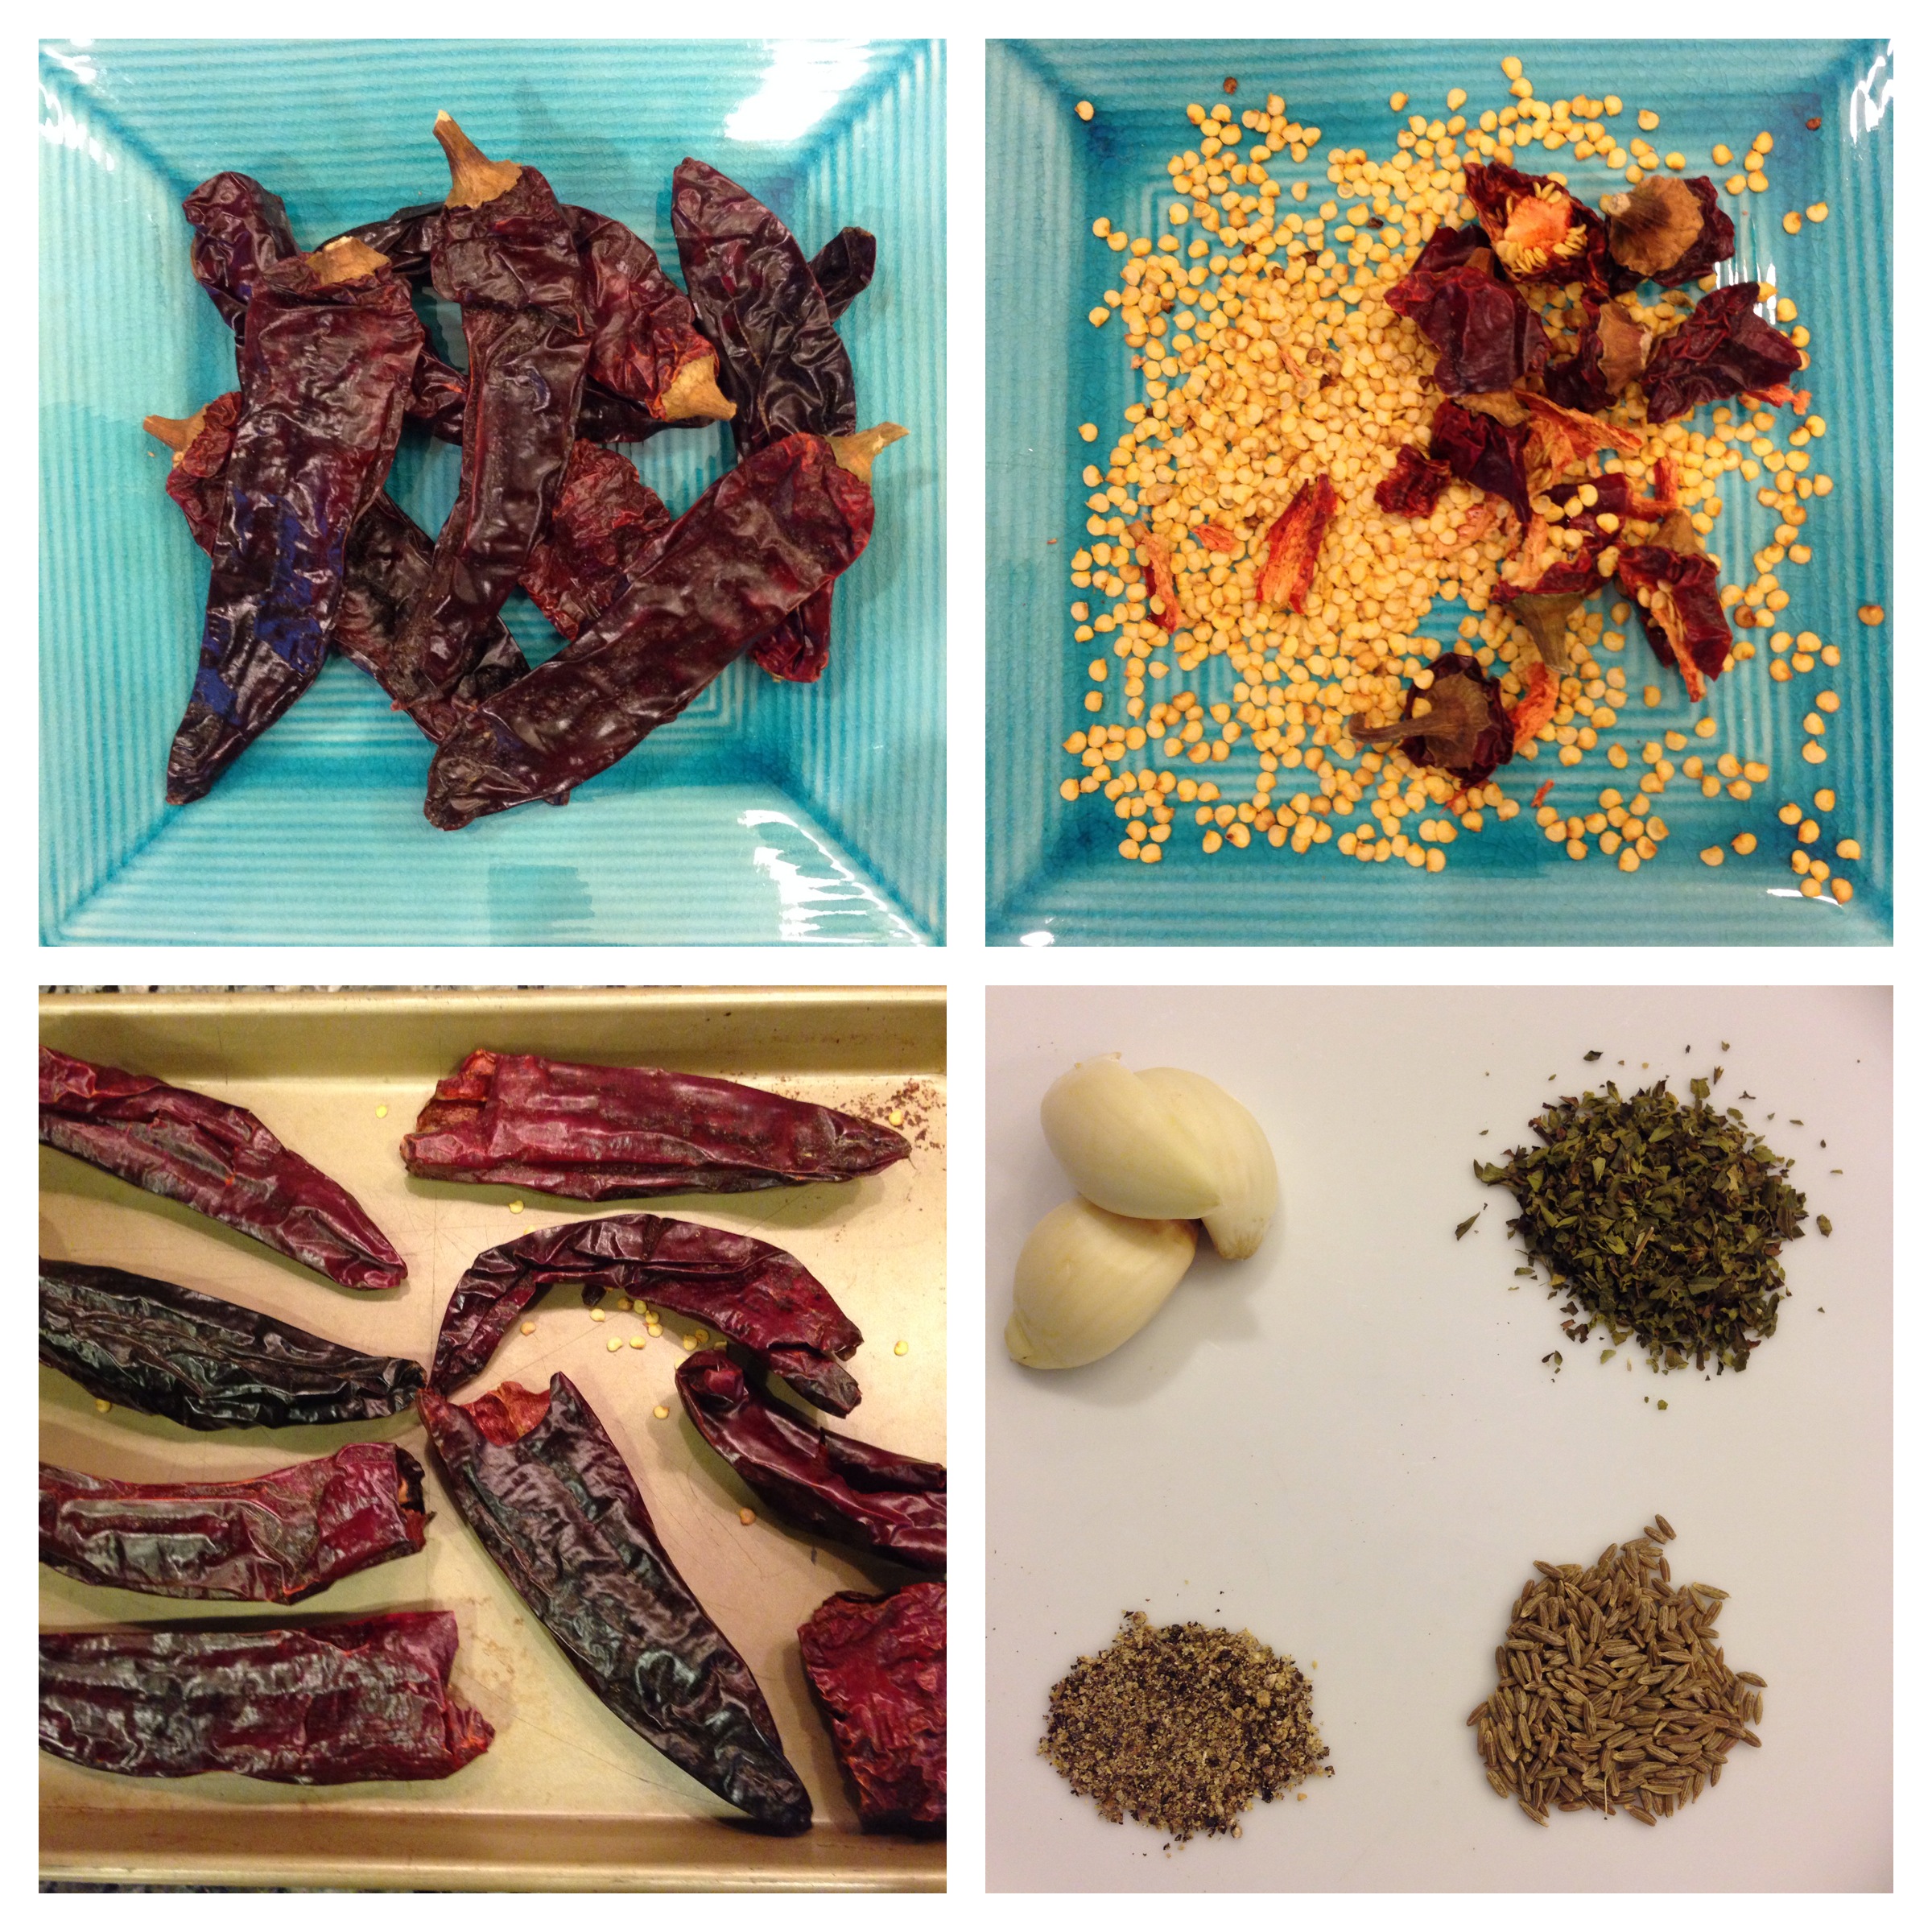
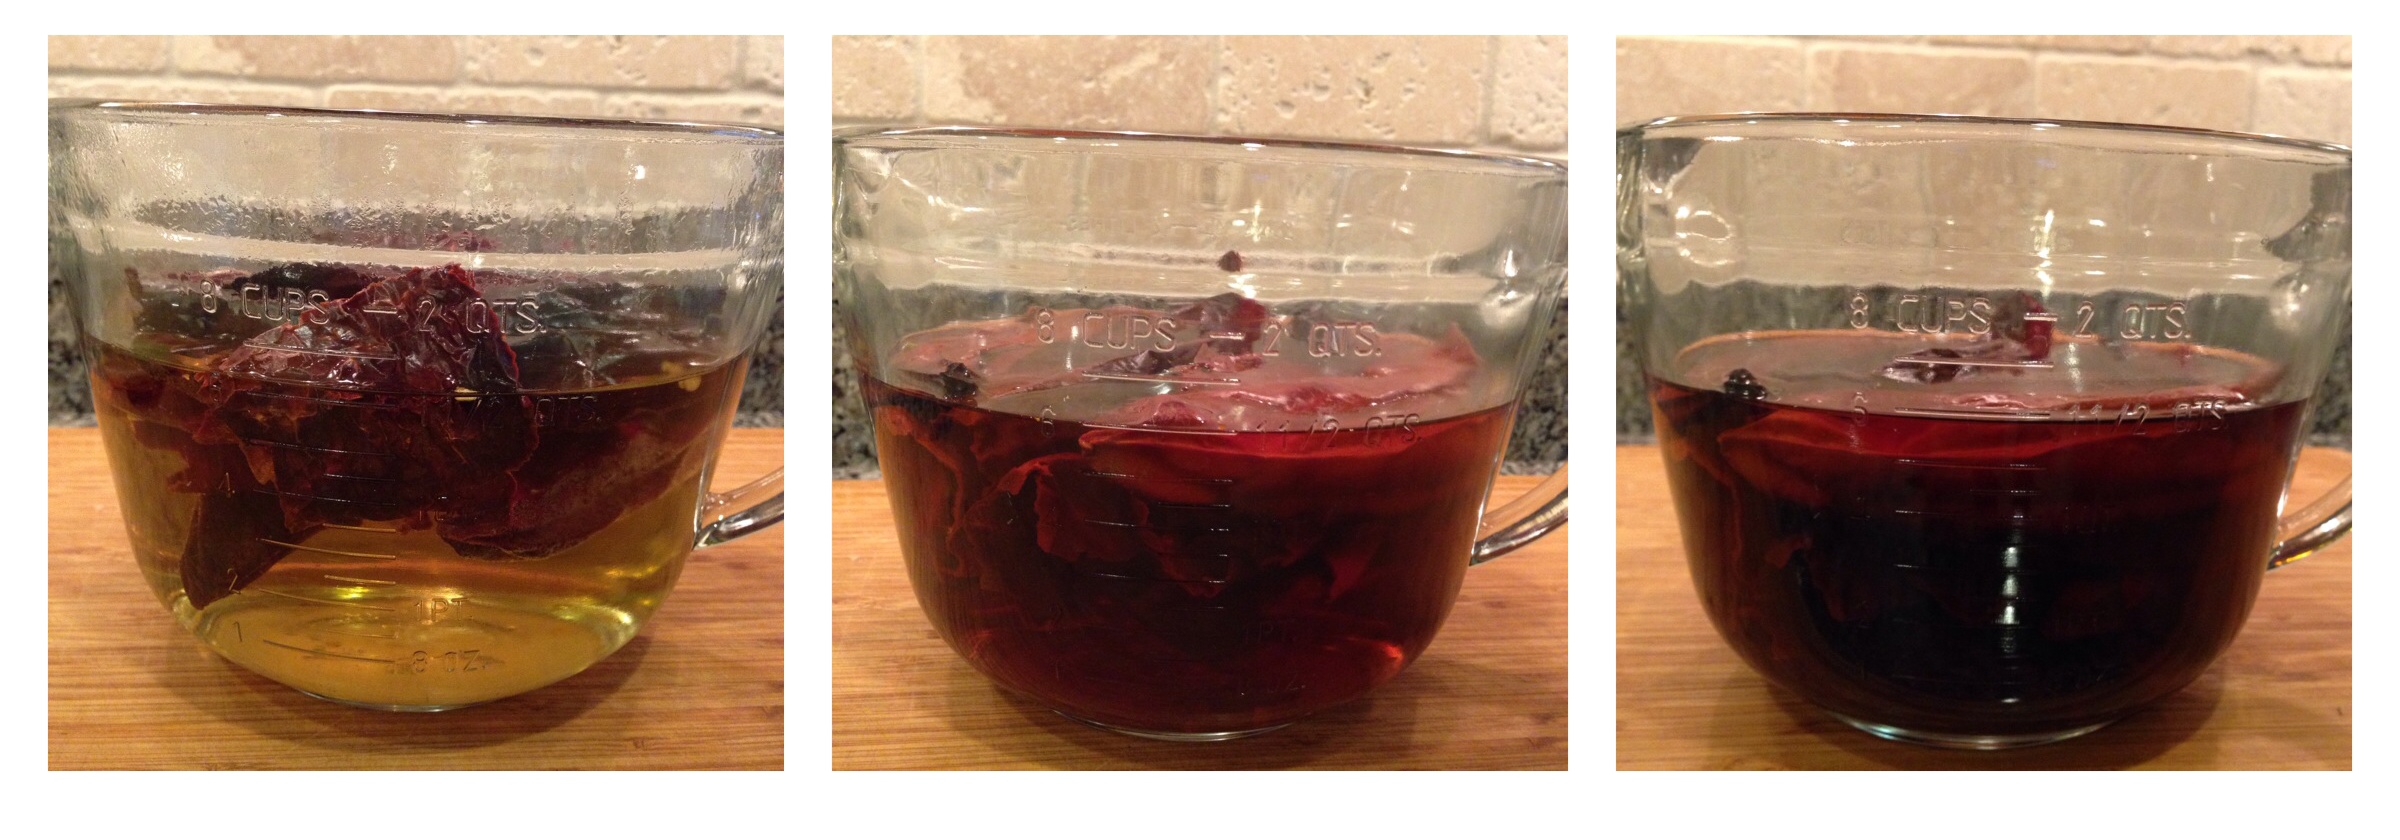
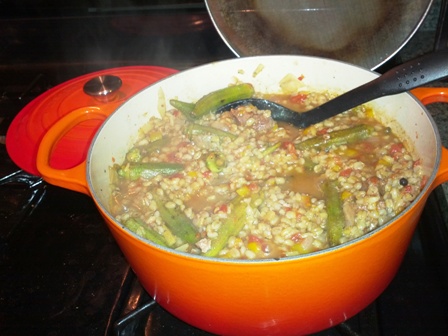
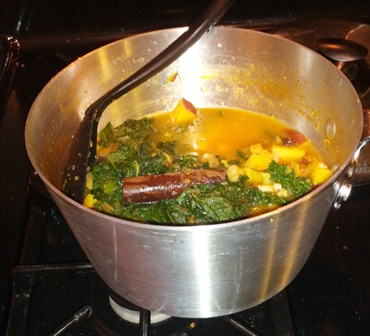
Guest blogger Maya reports great success with this family recipe – however, she warns that you *really* need to take your time with this, especially taking care to cook slowly and not let things burn. Indian cuisine, she reminds us, requires constant attention and no multi-tasking.

    This is why it’s her recipe, not mine.   😉

    The Shrimp:

    • 1 – 1.5 pounds large or extra-large shrimp, peeled and deveined.

    The Marinade:

    • 1/2 teaspoon kosher salt
    • 1/4 teaspoon ground peppercorns
    • 1/4 teaspoon cayenne pepper
    • 2 tablespoons lemon juice (from about 1/2 lemon)

    To make the marinade, place all of the ingredients in a gallon-sized resealable plastic bag. Add the shrimp, toss to coat, and refrigerate.

    The Sauce:

    • 1 cup water
    • 1/4 cup canola oil (don’t use olive oil – flavor is too strong)
    • 24 curry leaves, roughly torn (optional)
    • 4 dried red chiles
    • 1 teaspoon ground peppercorns
    • A 3-inch piece ginger, peeled and minced
    • 1 medium red onion, finely chopped
    • 1 tablespoon plus 1 teaspoon kosher salt
    • 3-4 garlic cloves, peeled and chopped
    • 2 teaspoons ground coriander
    • 1/2 teaspoon turmeric
    • 2 cups canned chopped tomatoes (OR 4 chopped salad tomatoes)
    • 1 teaspoon Sambhaar powder, or 1/2 teaspoon curry powder
    • 1 can of full fat coconut milk
    • 1 cup chopped fresh cilantro

    Preparation:

    Set 1/2 cup of water next to the stovetop. Heat the oil with the curry leaves (if using) and chiles in a medium pot over medium-high heat until the curry leaves start to sizzle, 1 to 2 minutes. Add the ground peppercorns and cook for 1 minute longer. Stir in the ginger, onion, and salt and cook, stirring often, until the onion is browned, about 8 minutes, sprinkling with water and stirring whenever the onion and ginger begin to stick to the bottom of the pot.

    Add the garlic, coriander, and turmeric and cook until the garlic is fragrant, about 1 minute. Reduce the heat to medium-low and add the tomatoes to the pot. Cook, stirring and scraping the browned bits up from the sides and bottom of the pot, for 1 minute. Increase the heat to medium high and simmer for 5 minutes, stirring often. [if using fresh chopped tomatoes instead of canned, will take a bit longer than 5 minutes to cook it down. Use really high heat and stir often, adding 1/2 cup water if it gets too dry.]

    Stir in the Sambhaar and cook for 1 minute, and then pour in the coconut milk. Bring to a boil and add the shrimp and any accumulated juices. Bring to a simmer and cook until the shrimp are curled and opaque, about 2 minutes. Stir in the cilantro and enjoy!

    ———-

    – MAW

  • 21Oct

    photo 1Enchiladas are one of my top 5 most craved meals. If I go to a Mexican restaurant, I inevitably find my way to the enchilada section of the menu and usually get a combo of beef and cheese enchiladas, always with red sauce. I also make them at home frequently. I love their melted cheesiness, the soft corn tortillas filled with beef, the flavorful red sauce… from a can! Other than beans and tomatoes, I’m not big on canned food.

    So, the other day, as much as I’ll happily, and without shame, admit to photo 2loving the canned sauce, I began to wonder… “How do they make that?!” So I started to google. I am by no means an authority on authentic Mexican food, but my taste buds don’t lie to me very often. Do you know how many “authentic Mexican enchilada sauces” used tomatoes as their base? dozens! Even I know that’s not how it’s made. I knew the sauce was based on dried chiles, but that’s about all I knew.

    photo 3So I researched (obsessively) and found two recipes that sounded very authentic, and had no tomatoes or flour on their ingredient lists. One was based on a recipe from Rick Bayless’ cookbook, and if you’ve never heard of him, he’s like the ultimate rock star chef when it comes to authentic Mexican cuisine. Another was from mexicoinmykitchen.com. I took my favorite elements from both and combined them with a few other things I learned on my googling adventure, and came up with this. It was so fun and satisfying to create something from scratch that I have loved for so long! And it was really inexpensive and easy. The best part was that my house smelled like a Mexican restaurant, which I took as a sign I was doing something right! Here’s how I did it.

    Mild Red Enchilada Sauce

    Ingredients:

    • 8 dried ancho chiles (also called California chiles)
    • 3 whole garlic cloves
    • 1 tbs salt
    • 1 tbs sugar
    • 2 tsp black pepper
    • 2 tsp dried oregano
    • 1 tbs cumin seeds (or ground cumin)
    • tiny pinch of ground clove (traditional, but optional)
    • 2 tbs white vinegar
    • 2 cups chicken broth
    • 2 cups soaking liquid
    • 3 tbs vegetable oil

    To Prepare:

    Preheat oven to 400. Set a tea kettle or small pot of water to boil. Prepare chile peppers by tearing or snipping of stems and shaking out as many seeds as you can. Place peppers on baking sheet and toast in preheated oven for 5 minutes. Place peppers in a large heat proof container and pour over boiling water to cover. Let them steep for 1-2 hours. The water will become a deep red color and the peppers will become very soft.

    Place peppers, two cups of soaking liquid, garlic and spices in a blender and puree until completely smooth. Heat oil in saucepan and add the pureed mixture, vinegar, and chicken stock and cook over medium-high heat until the sauce reduces and slightly thickens.

    Use in your favorite enchilada recipe and enjoy!

    Note: For a vegetarian version of this, either use vegetable stock, or just use 4 cups total of the soaking liquid and omit the stock all together.

    -ALH (Ani)

  • 16Oct

    Goat StewI’m furloughed. That means I’ve had time to explore recipes that take way longer than my usual 30-minutes-and-done dinner routine, and also to use ingredients I don’t really have any idea how to address. I saw bags of trigo mote verde (peeled green wheat) at the Latin grocery I’d been meaning to check out for some time, and bought it on a whim. When I saw the goat tidbits were on sale, an idea began to form. When I started to ponder what to cook, I noticed that the goat was not … the highest quality … and was going to need major work to taste good. I’m not one to waste food if I can avoid it, so I decided that some spice-fu should do the trick.

    So, inspired by the Spanish labeling on the wheat, I decided to take a Latin direction (heavily informed by my own Caribbean leanings with respect to goat). I started with sofrito:

    • 1 large yellow onion, diced
    • 2 yellow bell peppers, diced
    • 1 head of garlic
    • 2 habanero (scotch bonnet) peppers, finely diced
    • 1 tsp dried cilantro
    • 1 tsp dried basil
    • 1 tbs sesame oil
    • 2 14.5oz cans of diced tomatoes, one drained

    And added the other ingredients along the way:

    • 2 pounds goat meat (boneless, chopped into 1 inch cubes)
    • 1 bag of trigo mote verde (peeled green wheat)
    • About 5 tsp fresh grated ginger
    • A handful of allspice berries
    • 1 tsp each cumin, turmeric, and cinnamon
    • 1 tsp sea salt
    • 4 cups water
    • 1/2 cup white wine vinegar
    • 1 pound okra (washed, but NOT CUT*)

    I browned the goat briefly in a large dutch oven, then set it aside.

    Next, I added all the sofrito ingredients except the tomato, and tossed over medium heat for about 5 minutes, until fragrant. Then I added the tomatoes and re-added the goat.

    Once well mixed, I added 3 cups water, trigo mote verde, allspice, cumin, turmeric, cinnamon, and salt, and brought it all to a boil. Once boiling, I reduced the heat to simmer and covered the pot, leaving open to let some steam escape. Stirring occasionally, and sometimes tasting to adjust flavor, I let that cook about 30 minutes.

    At this point I added the ginger, vinegar (I didn’t want to cook away all that sharpness), and a bit more water, and re-covered for another 15 minutes or so. At that point, things were looking close to done, so I added the okra and did some final salt/pepper adjustments.

    Another 10-15 minutes saw the okra where I wanted them, nice and al dente as a textural contrast, so I turned off the heat and served my stew. Delicious, with the heat and spice and vinegar pushing the very earthy goat into a lovely flavor profile, and the long cooking keeping it nice and tender.

    This recipe makes what I’d call about 10 servings, so I’ve been taking fun ways to use the leftovers too. My favorite so far: wrapped, dolma-style, in collard greens blanched in lemon juice. Enjoy!!

      – MAW


    * Oxygen is what makes okra get all slimy. If you don’t cut it before cooking, the texture is much nicer.

  • 09Oct

    Being furloughed and not really having much in particular to do (but needing to save money!), I’ve been experimenting with African cuisine, particularly soups and stews, and even more particularly rekindling my love of (a) couscous and (b) fufu.

    What follows is my favorite concoction so far, a hybrid recipe using ideas from a few places – mostly from The African Food Joint, Serious Eats, and Leslie Cerier. Being me I couldn’t be bothered to follow any of the recipes exactly, but the result was sufficiently delicious (if not all that authentic), to make it very worth sharing.

    Vegetable StewI used:

    •  2 cups cherry tomatoes
    • 1 medium yellow onion, chopped
    • 1 Scotch bonnet Pepper, seeded and minced
    • 1 large Yam (the purple kind with white flesh), cubed
    • ½ cup raisins
    • 1 can Garbanzo Beans
    • 4 cups kale, chopped
    • 6 small garlic cloves, finely diced
    • 1 Cinnamon stick
    • 1 tablespoon Sesame oil
    • 4 cups Chicken Stock
    • Salt, pepper, cayenne to taste

    What I did:

    •  In a large pot (I used an aluminum stock pot), add the tomatoes, onion, 3 cloves of garlic, and Scotch bonnet and toss with the oil over high heat, just until it starts to get fragrant.
    •  Add 1 cup of stock and bring to a boil for about 2 minutes, then blend using your hand blender.
    •  Add your remaining stock and bring back to a boil, adding your yams and cinnamon stick. Boil on high heat for about 5 minutes. Now lower heat to simmer, cover the pot, and leave for about 15 minutes.
    •  Next, add your chickpeas, up the heat to medium, and taste/adjust heat level using cayenne. Stir in your kale and remaining garlic, cooking a few minutes till the kale is done.
    •  Season with salt, black pepper, and more cayenne if needed.

    The first night I made this, I made fufu as described in the African Food Joint recipe, except I made quenelles out of it which I then fried in butter, because I just got back from France, but it goes well with the more traditional fufu, and couscous too. If I were going to adjust this recipe next time, I’d again call out to my French culinary habits and add in some cream in the second step (the blending), and maybe use a second Scotch bonnet as opposed to extra cayenne. That said, I’m going to happily keep eating this batch till it’s gone!

     – MAW

  • 15Mar

    Dinner!In these cold winter months, everyone loves warm comfort foods, but I always find myself yearning for brighter colors on my plate as a reminder that spring might someday arrive (stupid lying groundhogs aside). Luckily, even among winter’s dull feasts of brown tubers and dark greens, there’s still ample color to be found.

    Shopping around last week, inspiration struck me in the form of bright green bitter melons and celery, bright-skinned Beauregard sweet potatoes, and, of course, the presence of smoked pork jowls (not brightly colored, but gleaming suggestively in my imagination). I also picked up a celery root because (a) they’re tasty, (b) the flavor sounded like a good counterpoint to everything else, and (c) I’ve decided to take the whole snout-to-tail food movement to its illogical companion, eating root-to-leaf.*

    Ingredients:

    1 sweet potato, peeled
    1 baseball-sized celeriac, peeled
    3 smoked pork jowls
    2 medium bitter melons
    1 sweet onion
    1 medium leek (light parts)
    The very tiniest bright yellow hearts of a bunch of celery, minced
    Mustard seed
    Coriander
    Fennugreek
    Oil
    Mirin


    Sticking to some cold-weather traditions, I made a mash to accompany my (fairly traditional) usual bitter melon concoction. First, I threw the potato, celeriac, and jowls in my stock pot, and covered with water and brought it to a gentle boil and let it go about 20 minutes. When done, drain (reserving the liquid) and move the roots to a large-ish bowl.

    While that was boiling, I heated oil in my sauté pan with the spices, adding the leeks to melt and onions to caramelize. After about 15 minutes, I pulled the jowls out of the water, patted them dry, and threw them in my pan, cranking up the heat to render some of the fat. When that looked about right, I added the diced melon and celery, tossing to cover them with all that smoky, spicy goodness. When everything was cooked, I deglazed with a 1:1 mix of the reserved liquid and mirin.

    I poured deglazing that liquid over top of my roots for a rough mashing. I just used a fork because if you mash too finely or puree it, you’ll lose that lovely bi-color effect, and muddy the flavor. This way, you still get distinct bites – some sweet with mostly potato, some sharp crunchy celeriac, and some a lovely mix. Adding the bitter melon sauté over it was a wonderful combination – bitter, spicy, smoky, and of course: jowl!

    This is a wonderfully delicious and healthy one-dish dinner, but I served it with a fried egg on the side, because why not.

    – MAW

    [ad]

    * Not really. This just sort of happened and when I noticed I decided to be silly about it because why the hell not. 

Categories

Archives